Bits of Happiness: Baking Pretty Bread
Although I have been baking gluten-free sourdough for just about 9 months and still have a lot to learn, the thing I get asked about regularly is my style of scoring and the baking parchment forms I use. I have to say that the artistic process around both is something that makes the baking process more special - even therapeutic - to me.
The scoring I do most frequently involves vines and leaves or depending on the bread, a bit of fruit such as cherries. The flowing, curved lines of each of these lend themselves well to defining a bit of a crown area for lift when baking. Since gluten-free dough doesn’t seem to expand much, the scoring stays relatively close to the original “drawing”.
The most challenging part of scoring is getting the depth of cut right. Too deep and the split expands too much, too shallow and there is almost no expansion so you end up with a random burst.
While the depth of cut takes a bit of practice, it helps to have a design to practice with.
Regarding my tools of choice, they vary between a traditional lame on a wooden handle and….rather less traditionally….the tip of a very sharp boning knife! The blade of the lame is great for leaves with points as in the sample pattern here, but I find it harder to control for patterns with small circles and ovals. For those, the pointed tip of a boning knife gives me more control.
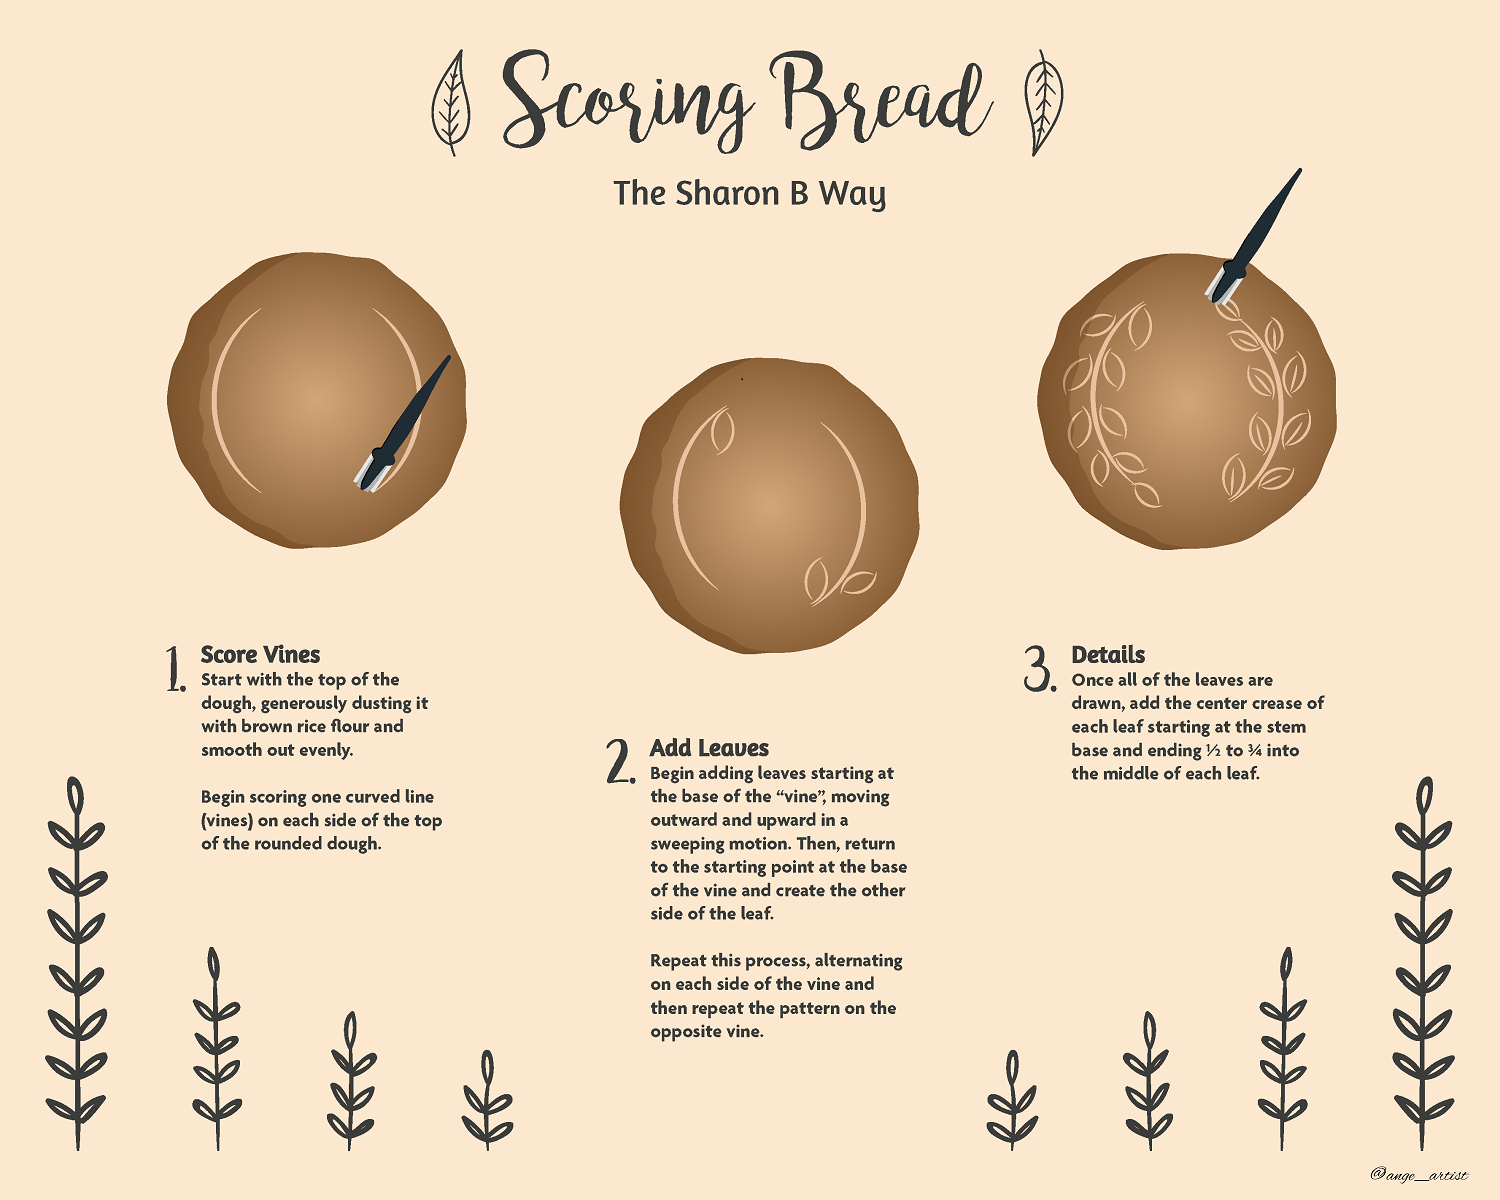
And to give you a clearer idea of the strokes (in order):


Following are examples of variations on the leaf patterns, using larger leaves, rounded leaves, smaller slashes in place of drawn ‘leaves’… Once you have a feel for the depth of cut, you can really play!


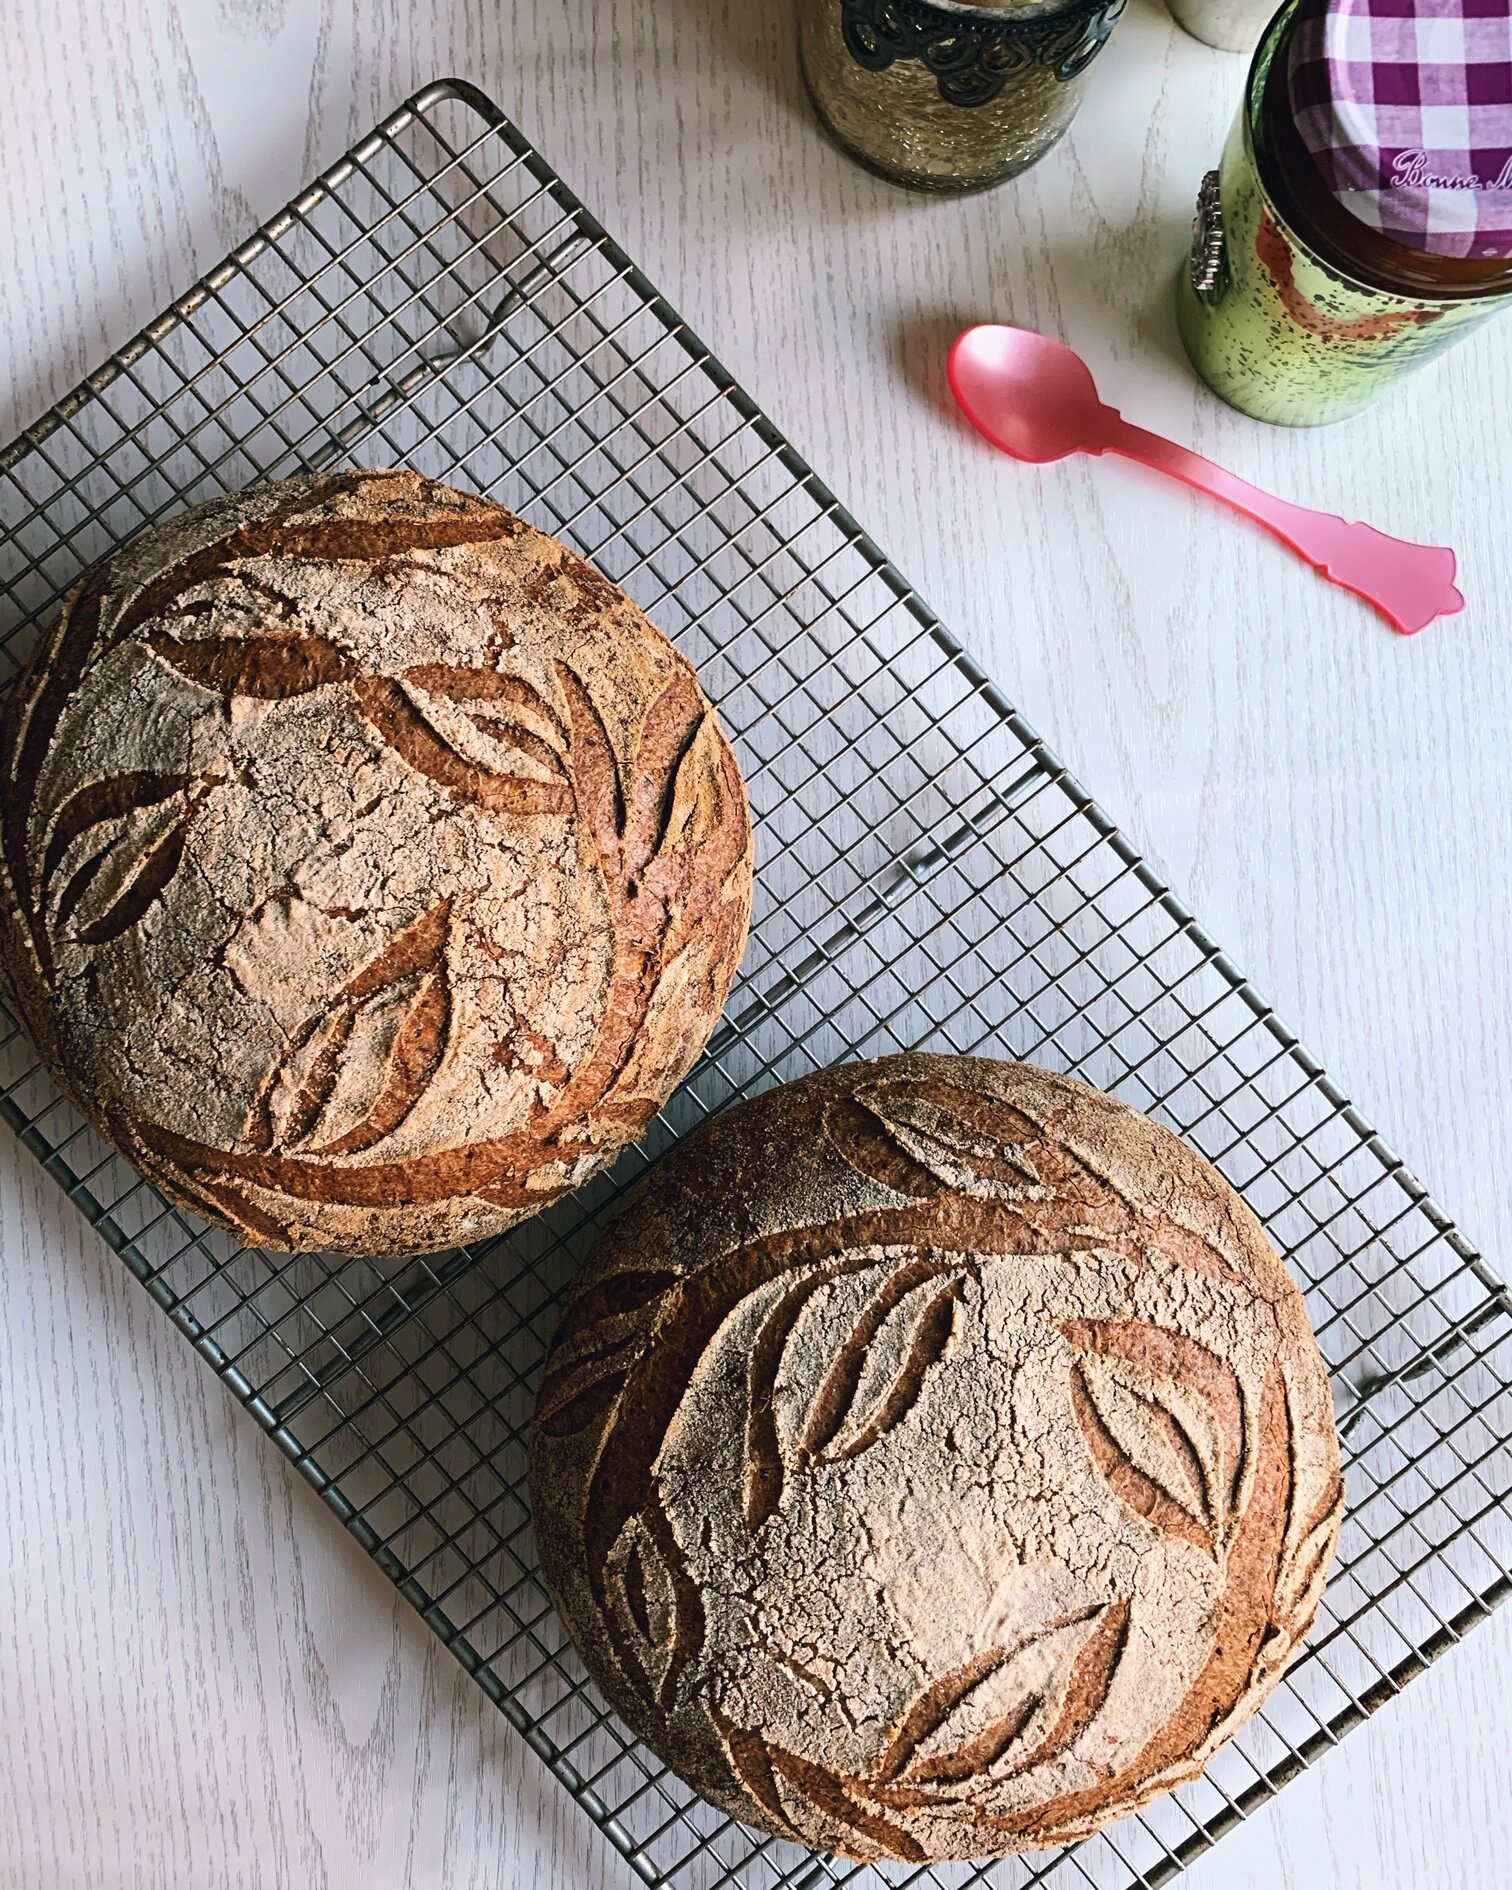


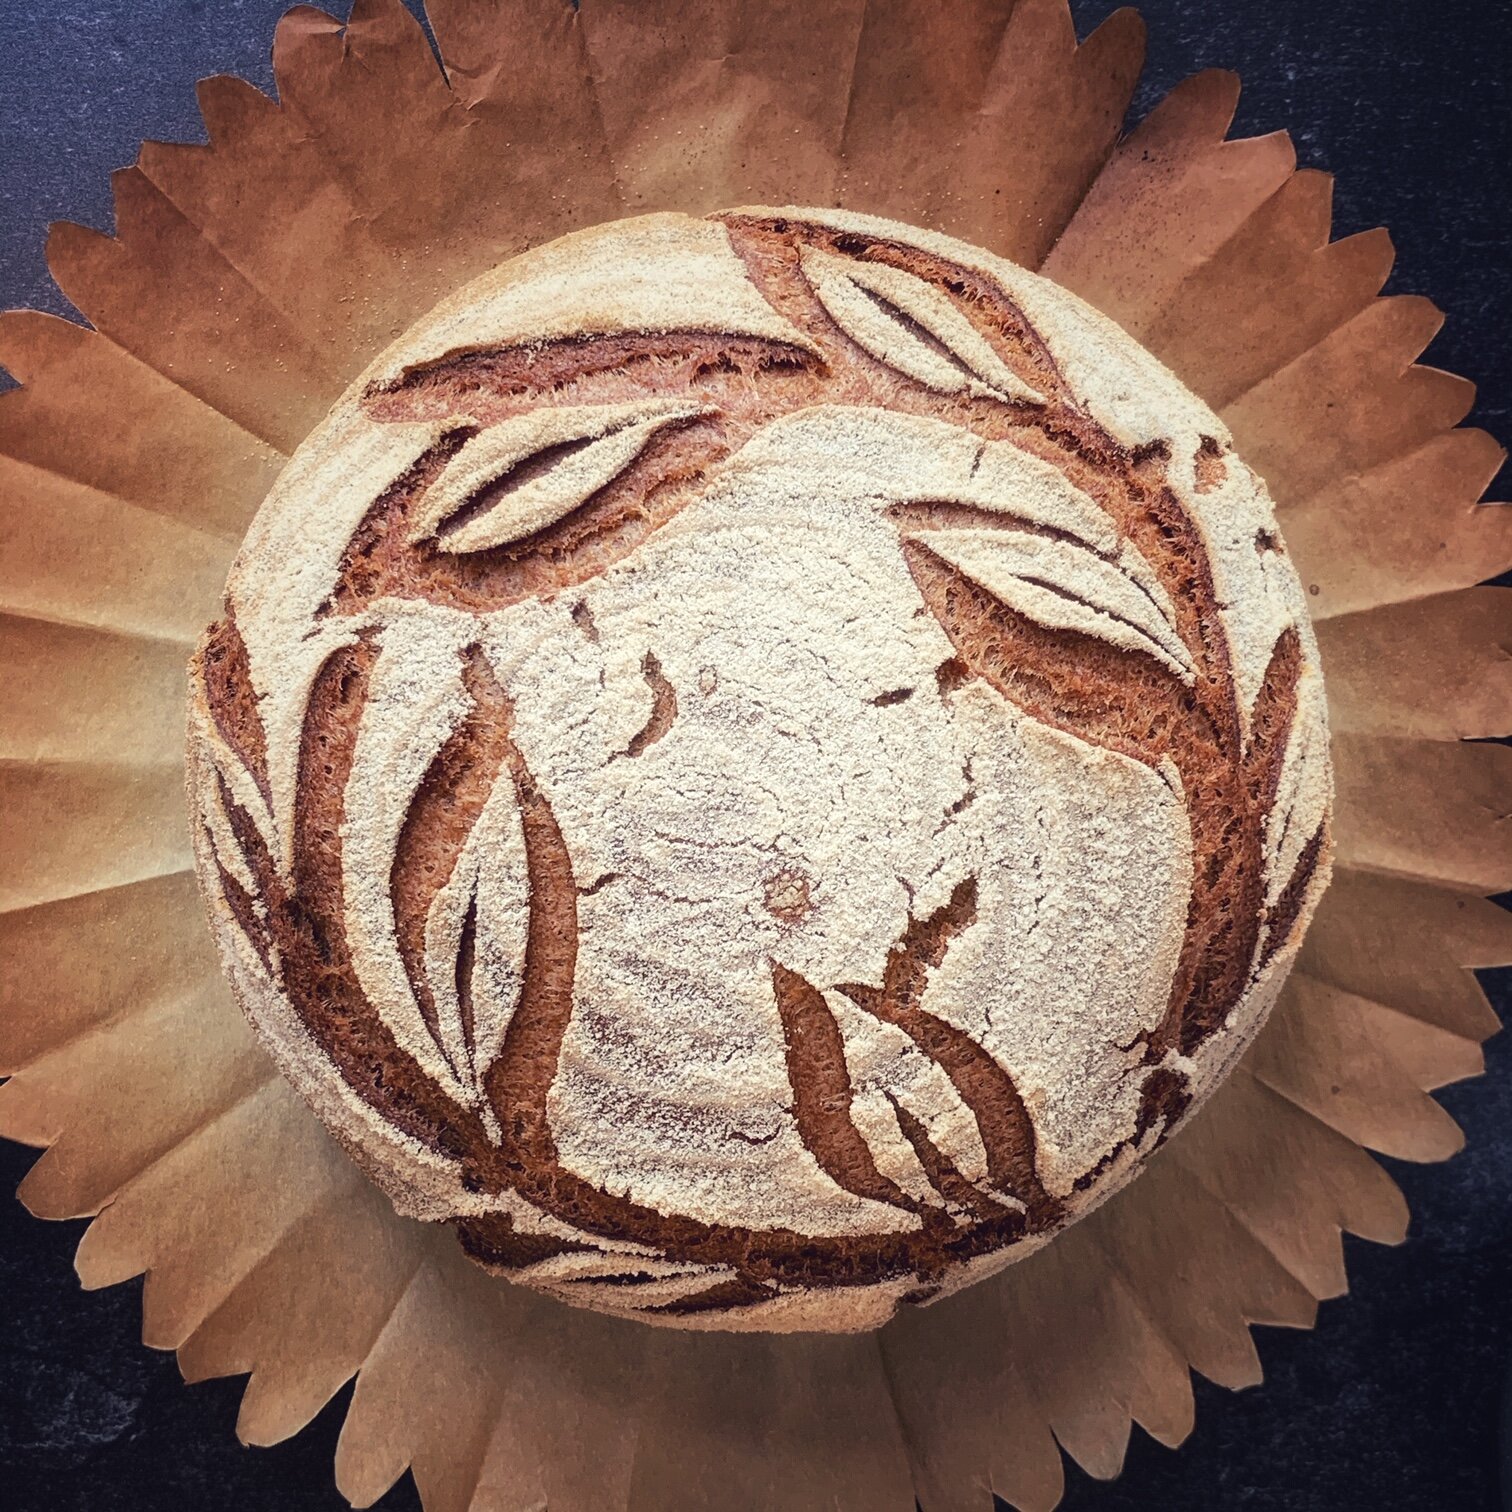
The baking paper I mentioned can be seen in the last image above. Since I bake on a baking stone instead of in a dutch oven, I use the paper to both keep the stone cleaner and facilitate removing the bread when done. Cutting the paper into decorative-edged shapes just brings me back to childhood craft time and makes me smile when I see something practical made cute.
The process is essentially a combination of the methods for folding parchment to line a cake pan and cutting the edges as you would making a paper flower or paper snowflake.
If you are not yet familiar with folding a square-ish piece of parchment paper to be cut into a circle, the following instructions by Daniel Gritzer from the Serious Eats site will explain the concept.
https://www.seriouseats.com/2016/04/how-to-make-a-parchment-paper-lid.html
Once you have your paper folded into almost the smallest wedge possible (about one fold more than shown in the video above), you can shape the edges. With the paper still folded, cut according to the style you would like:

Paper cutting guides
Thank you for joining me to go through all of the technical details. I hope you will give these designs a try and they’ll make you smile, too! If you give either a try, be sure to tag your creations with #miseenplacegf so I can see your beautiful work!
Also, I want to give a GIANT thank to @ange_artist for the incredible work she did on the bread scoring info-graphic and GIFs! Didn’t they turn out great???